What You’ll Need to Get Started
Allow 15-30 minutes and have the following ready:
-
Admin Permissions for Wellio
Admin access is required to upload enrollment files. If you don’t have admin access, ask a colleague with an admin account to update your access. Failing that, request this from us at support@wellioeducation.com -
Teacher AND/OR Student List
You can use the first approved version of your school timetable. Adjustments for individual students can be made during the first few weeks of term.
Submit your completed Teacher & Student files by Monday 20th January, 2025 to ensure classes are ready to go when the 2025 school year begins.
We encourage you to begin this process as soon as possible, as our Support Team experiences a high volume of inquiries during this time, and may take longer than usual to get back to you.
Step 1: Download the Enrolment Template
Ensure your enrolment files mimic the templates below. This will ensure the portal processes your file. Use school email addresses and for teachers with multiple classes, use ; between each class name.Teachers:
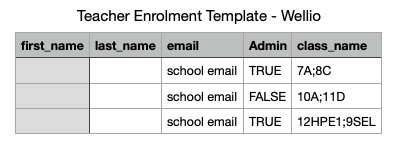
Download the Enrolment Portal Template CSV for Teachers
Students: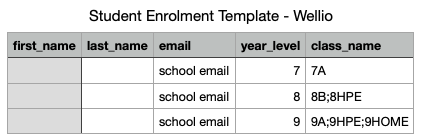
Download the Enrolment Portal Template CSV for Students
Step 2: Save and name the spreadsheet
Once you have filled in all the necessary information, re-name your CSV file to include your school name and the academic year, for example: "School Name - 2025 Class Enrolment" and save/download this file to your computer.
Step 3: Log in to your Wellio admin account here
You'll need admin-level permissions to set your school up in Wellio. If you do not have admin access please contact us at support@wellioeducation.com
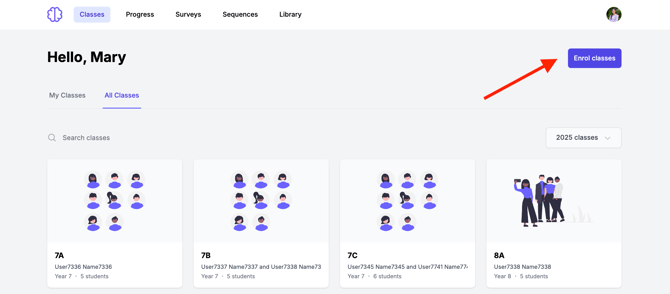
- In the Classes tab, click Enrol Classes button on the top right-hand side
- You can use the Create a class option to help with creating individual classes in the platform.
-gif.gif?width=670&height=272&name=3-ezgif-com-video-to-gif-converter%20(1)-gif.gif)
- Depending on the data you have available, either: Import Teachers or Import Students. If providing both, repeat the process for each.
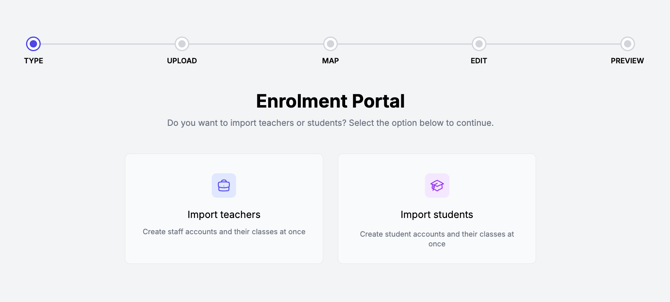
⚠️ Please Note: If your school is set up for device-free use, you will not see the Import Students option. Only the importing of teachers is required. - Choose the appropriate Academic year, and then Upload your CSV file.
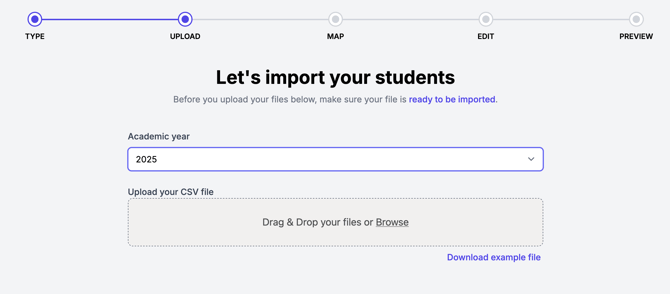
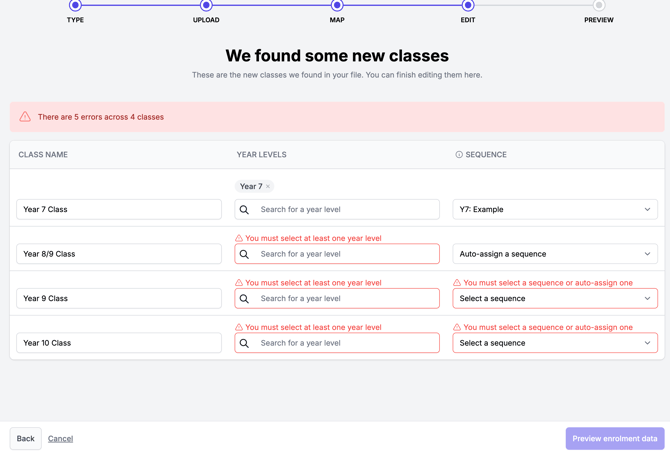
⚠️ Please note: If you're using Firefox, you may receive an "invalid format" error when uploading your CSV - even if the file is correctly formatted. If this happens, try switching to another browser such as Chrome and uploading again. - Make the necessary amendments to your file as flagged by the portal. Re-upload the file by repeating the Upload and Map phases until all errors are resolved.
If your domain name is not recognised, please email or call us immediately.
- Confirm the next steps as prompted by the portal before clicking Preview enrolment data.
- Once you've edited the fields, preview your classes one final time before generating accounts and classes by selecting either of the options.
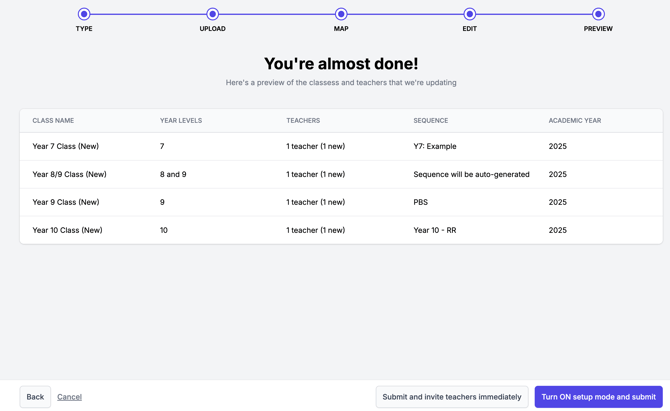
Decide if you want your teachers/students to instantly receive their Invitation email. If you do, choose:
If you don't, because you want to do this at another time, choose:

Your teachers/students will be sent an invite only when you turn off setup mode in your settings.Lastly, check your setup by navigating to Classes and Sequences. This will allow you to verify the portal accurately processed and generated your enrolment.
If you encounter any issues or have any questions, please reach out to us at support@wellioeducation.com. When uploading your file, please ensure this is no larger than 2MB.
If you forgot to enrol a class or want to add a new class later in the year, simply enrol a new class individually through the enrolment portal. Here's a guide for this: How to Add a New Class to the Wellio Platform