
🔒 This tool is only available for teachers with Admin-level access to Wellio.
If you're a classroom teacher and want a lesson changed (for example, a slide added, deleted or reworded), contact your school's Wellio admin. They can edit the lesson for the whole school.
Editing a lesson
- Click Library from the toolbar at the top of your Wellio home-screen.
- Navigate to the lesson you want to customise.
- Click the Edit lesson button on the top-right corner to create a draft. If your school has already edited and published this lesson, the button says Update lesson instead
Add or delete slides
-
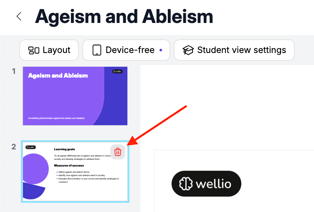
Delete a slide: Hover over the slide thumbnail in the left-hand panel and click the trash icon:
-
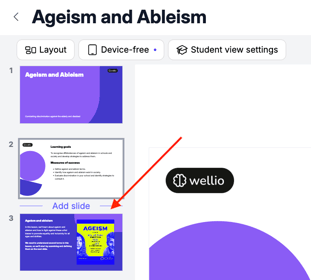
Add a slide: Hover between two slides until Add slide appears, then choose a slide layout from the right-hand panel:
-
Select any text block on the page to edit it. A toolbar will appear with formatting options like bold, italics, and font size
-
Read the instructions on editing images and videos and Sparks
All changes are saved automatically. The Last Saved time is displayed in the top-right hand side and disappears after refreshing the page.
⚠️ Saved isn't the same as published. Saved changes stay in your draft. Teachers won't see them, including in Present mode, until you publish your changes.
Adding a text box to a slide
There isn't a separate "insert text box" button. Text boxes come from the slide's Layout, so to add one you switch the slide to a layout that includes text.
- Click Edit lesson and select the slide in the left-hand panel.
- Click Layout in the toolbar above the slide.
- In the Choose a layout panel on the right, pick a layout that includes text, such as Text left / image right or Text left (white).
- Click Switch to confirm.
- Click into the new text block to type and format it.
Switching layout may remove content that doesn't fit the new layout. Copy any text you want to keep before you switch. Each layout has a set number of text blocks, so you can't add extra free-floating text boxes.
Editing polls, quizzes, open responses and Sparks
Interactive questions are edited on their own slides in the lesson editor. There isn't a separate "interactive components" menu.
- Click Edit lesson and select the slide with the poll, quiz, open response or Spark in the left-hand panel.
- To change a question, click its card on the slide. Edit the question and answers in the right-hand panel. Click Add answer to add another option.
- To remove a question, hover over its card and click the trash icon.
- To add another question to the same slide, click Add Poll question, Add Quiz question or Add Open question in the right-hand panel.
To add a new activity on its own slide, click Add slide, then choose the Questions / Spark layout. Then pick the type of question, or Add Spark.
Changes save automatically. Table questions can't be edited yet. For Spark questions, see How to edit a Spark.
Saving a draft
If you want to return to editing your lesson for later:
- Click the < Back button on the top-left hand corner to exit editing mode.

- To resume editing, go back to the lesson page and click Continue Editing.
Publish your changes
Before pressing Publish – have you edited your Prep Notes?
- Don't forget to review the lesson's Prep Notes before publishing any changes. This ensures consistency for classroom teachers: skipping this step may cause mismatches.
Once you've published your changes, they will appear in every version of the lesson that's available to the school: both within the lesson's corresponding sequence, and within your Library.
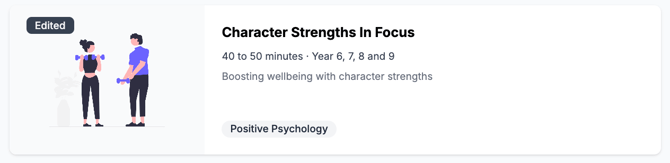
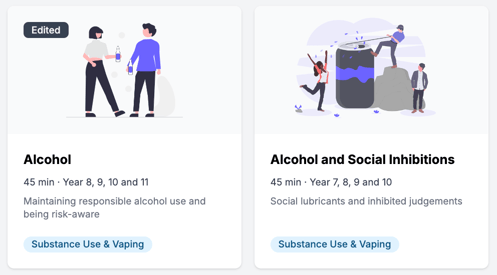
You can identify which lessons have been customised by Admins at your school by looking out for the "Edited" tag:
Other FAQs
I edited a lesson and it says it saved, but Present mode still shows the old version
Your changes are saved to a draft until you publish them. To make them show up when you present:
- Go to Library and open the lesson.
- Click Continue Editing.
- Click Publish.
Already published? Check whether students in that class have answered any questions in the lesson. A class that has started a lesson keeps the version it started with. Your changes will show for classes that haven't started it yet.
Why can't I edit a lesson from my class page?
Lessons can only be edited from the Library, and only by staff with Admin-level access. When you open a lesson from a class, you'll see Prepare and Present but no edit option. This is expected, and it's the same for admins.
- Admins: go to Library, open the lesson and click Edit lesson. Follow the steps above, then click Publish.
- Teachers: ask your school's Wellio admin to make the change.
Once published, the edited lesson is used by your classes. A class whose students have already answered questions in the lesson keeps the version it started with, so content doesn't change part-way through delivery.
Can I translate a lesson into another language?
Wellio can't translate lessons into other languages. If your school needs a lesson in another language, a school admin can edit the lesson in the Library and replace the slide text by hand, using the steps above. Remember to update the lesson's Prep Notes too.
If you're a teacher, ask your school's Wellio admin to do this.