Integrating tools like the Wellbeing Skills Index or School Climate Index into your wellbeing strategy helps create an environment of proactivity: where students feel supported and able to thrive academically, socially, and emotionally. By reviewing aggregated data and individual responses schools can:
-
Identify at-risk students early for targeted interventions.
- Uncover trends and areas of strength and opportunity for improvement.
-
Monitor the effectiveness of existing wellbeing programs and policies.
-
Tailor support to individual or group needs based on data-driven insights.
Glossary of Key Terms
- Baseline Survey: A comprehensive survey conducted once or twice a year.
- Trend Survey: A shorter follow-up survey analysing specific targeted factors.
- Wellbeing Factor: A specific category or theme that serves as a key driver of wellbeing.
- Favourability Percentage: The percentage of students that responded favourably to a question (answering either “Agree” or “Strongly Agree”).
- Index Score: A single percentage summarising overall results across all respondents.
- Factor Score: The average favourability percentage for all questions linked to the factor.
Don't fancy reading, watch the demo video instead:
Key Steps:
Use these insights to update your sequences and address identified wellbeing needs and opportunities in your school.
For guidance on viewing your report and interpreting your results, check out the Viewing and Interpreting your Survey Report guide.
To deep-dive into how each result is calculated, check out the How Survey Results Are Calculated guide.
For guidance on editing an existing sequence or building a new one, check out the How to Build a Sequence and How to Edit an Existing Sequence guides.
Step 1: Create a New Survey
- Navigate to the Insights -> Surveys tab at the top of your screen
- Click the Create Survey button
- Choose your survey type from the following options:
- Baseline: provides you with a comprehensive, high-level view of student wellbeing, to establish your baseline and highlight opportunities for improvement and action. This should be the first survey you run for the year!
- Trend: allows you to focus on specific factors selected from the original baseline survey, making it easier to monitor improvements and impact of interventions and changes over time.

- Choose your survey template from the following options:
- Wellbeing Skills Index: A comprehensive survey that measures students’ proactive wellbeing skills. The results will help identify key areas of strength and opportunities for support.
-
School Climate Index: Measures students’ perceptions of their school experience. The results will help identify themes and environmental factors that may be affecting your school’s climate.
- If you're creating a Trend survey, select 1-3 specific factors from the template that you’d like to focus on:
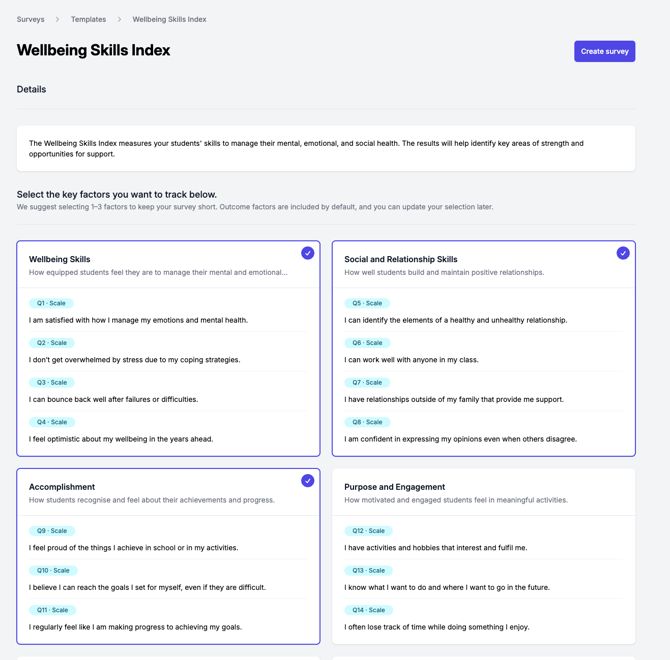
- Once you’ve confirmed you’d like to use these questions, click Use Template (for Baseline) or Create Survey (for Trend).
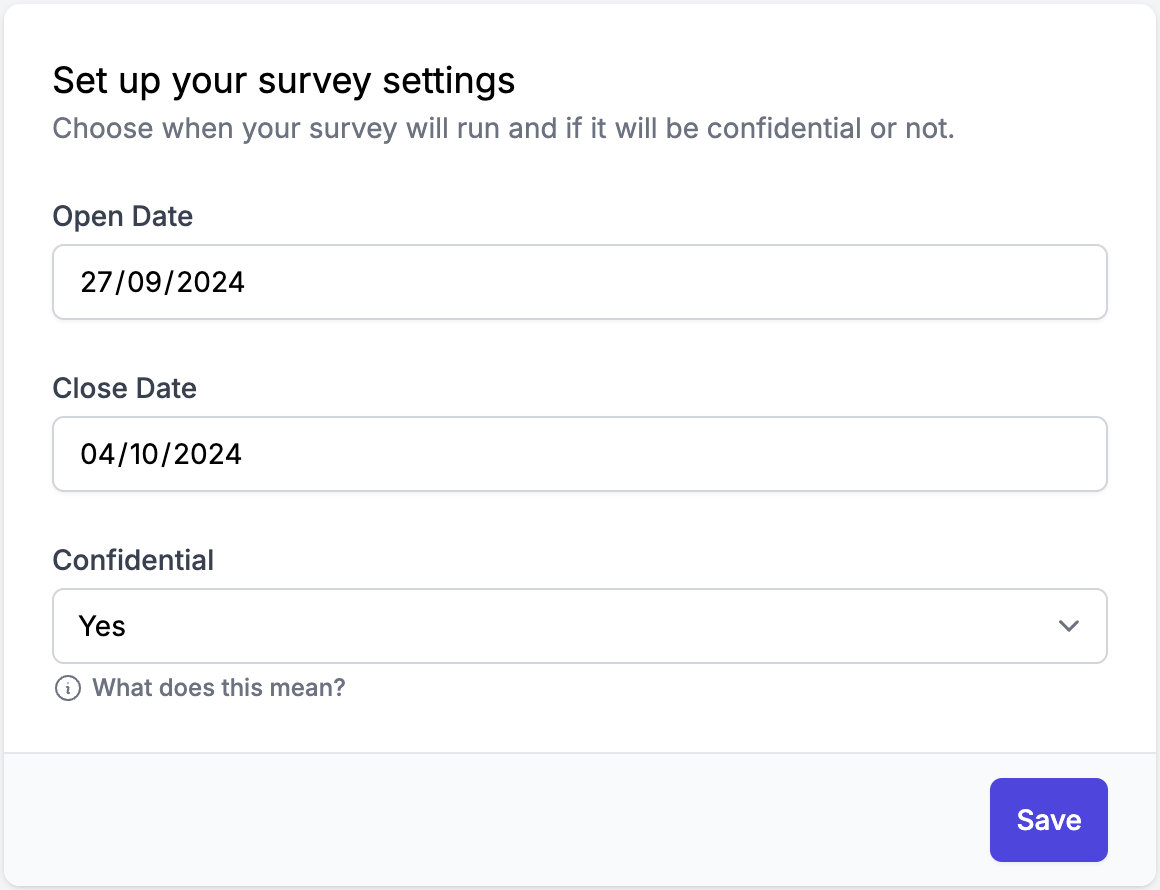
Step 2: Select Dates to Run Survey
Choose the Open and Close dates for your survey to determine when it will be available for students to complete.
Choose if you'd like survey results to be confidential (default) or not.
- Confidential (default): Responses are anonymous and tracked by year level and class for aggregated analysis. Individual student responses will not be visible.
- Non-Confidential: Responses are linked to student profiles, allowing for detailed individual analysis and follow-up.
Step 3: Select Participant Year Levels
Target specific student groups and ensure the survey reaches the intended participants.
- From the drop-down menu, select the year levels you’d like to participate in the survey.
- You’ll see the total number of students that will receive the survey.

Final Step: Review and Publish
Before publishing, a confirmation pop-up will appear, showing participant totals, when the survey will go live and when it is set to close.

- If everything looks correct, click Publish.
- To save a draft, ensure all fields in the Settings and Participants tabs are filled in. Click Save, and your draft will be available on the Surveys page.
Tracking Responses & Student Participation
Once the survey is live, students will receive an email prompting them to complete it. Both students and teachers will will also be alerted directly when they log in to Wellio. Students earn XP for completing surveys.

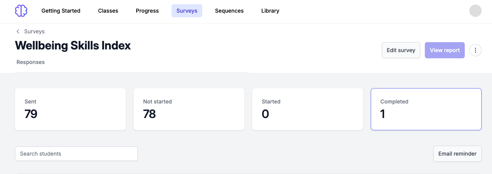
Sending Email Reminders to Students
If some students haven’t started the survey before the closing date, you can send them a reminder:
- Navigate to the survey page.
- Click Email Reminder.
- An email will be sent, reminding them to complete the survey.
Once your survey is complete, you can easily view and analyse the survey results to gain insights into student responses.
Edit a Survey
If you'd like to extend the Close date on a published survey to give students more time to complete it, navigate to the survey in question and select the Edit Survey button.

⚠️ Important: After making changes, you'll need to click Review & Republish for the survey to become available for students again.
Closing a Survey
To close a survey earlier than the original set time:
- Navigate to the survey page.
- Click Edit Survey and confirm:

- Edit the Close Date to 1-minute in the future e.g. if it is 4:00pm, set this to 4:01pm for today's date:
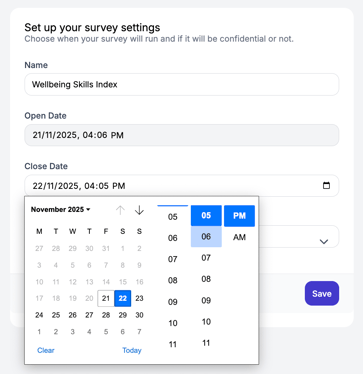
- Click Save and Review & Publish.
If you no longer need the survey, check out our help article for Archiving a Survey.